TL;DR:
- Proper surface preparation is crucial for long-lasting exterior paint and overall success.
- Always follow manufacturer label instructions for drying and recoat times, especially in varying weather conditions.
- Surface cleaning, repair, priming, and inspection are essential steps most guides overlook for durability.
Most exterior paint jobs fail before the first brush stroke ever touches the house. That’s the hard truth. Homeowners invest in quality paint, spend a weekend on ladders, and still end up watching their work peel, crack, or bubble within a season or two. The culprit is almost always the same: skipped or rushed preparation. This guide walks you through every stage of a successful exterior painting project, from gathering the right materials to verifying that your finished work will actually last. Follow these steps and you’ll protect your investment while giving your home the curb appeal boost it deserves.
Table of Contents
- What you need before you begin
- Step-by-step preparation for lasting results
- Handling tricky surfaces and edge cases
- Applying paint and verifying your work
- What most guides miss about exterior painting success
- Ready for a curb appeal upgrade? Explore expert remodeling solutions
- Frequently asked questions
Key Takeaways
| Point | Details |
|---|---|
| Prep is everything | Thorough cleaning, drying, and priming prevent most paint failures and ensure lasting results. |
| Label guidance beats rules | Following paint and primer instructions is critical for drying and recoat timing, especially in humid zones. |
| Tough surfaces need extra steps | Glossy or unique substrates require sanding and proper primer for reliable adhesion. |
| Inspect after each stage | Check surfaces after prep and paint for defects to maximize curb appeal and durability. |
| Professional help is available | Remodeling services can assist with complex projects, upgrades, and making the most of your exterior improvements. |
What you need before you begin
Good results start long before you open a can of paint. Think of surface prep as the foundation of your project. Without it, even the most expensive paint will underperform.
Start by making sure you have every tool and material on hand before you begin. Running out of primer mid-project or realizing you have the wrong roller can derail your timeline and affect the final quality.
Essential tools and materials checklist:
- Exterior paint in your chosen finish (flat, satin, or semi-gloss)
- Quality primer suited to your specific surface material
- Natural bristle brushes for oil-based products; synthetic for latex
- Rollers with appropriate nap thickness for your siding texture
- Extension poles and ladders rated for your working height
- Safety glasses, gloves, and a respirator mask
- Surface cleaner or pressure washer
- Putty knife, wire brush, and scraper for removing loose paint
- Sandpaper in multiple grits (80, 120, 220)
- Caulk and paintable patching compound
- Drop cloths and painter’s tape
You can also check our exterior improvement checklist for a broader look at everything that goes into a successful curb appeal project before you start.
Choosing the right paint and primer for your substrate:
Different exterior materials require different paint systems. Here’s a quick comparison to help you match your product to your surface:
| Surface type | Recommended primer | Best paint finish |
|---|---|---|
| Bare or weathered wood | Oil-based or shellac primer | Satin or semi-gloss latex |
| Previously painted wood | Latex bonding primer | Satin latex |
| Fiber cement siding | Manufacturer-specified primer | Flat or satin latex |
| Aluminum or vinyl siding | Bonding primer or self-etching | Satin latex |
| Masonry or stucco | Masonry primer or block filler | Flat or satin masonry paint |
| Metal (gutters, trim) | Rust-inhibiting primer | Semi-gloss oil-based or latex |
Paint quality matters, but it cannot compensate for poor prep. As Fine Homebuilding explains, the most common reason exterior paint fails is inadequate prep, specifically skipping cleaning, failing to remove loose paint, and neglecting to prime bare or repaired spots.
If you want to go beyond painting and explore your full range of options, take a look at our exterior remodeling overview to see how siding, trim, and architectural details all work together.
Pro Tip: Before priming or painting any surface, check its moisture content with an inexpensive moisture meter. Wood should read below 15% moisture, and masonry should be fully cured and dry. Painting over damp surfaces is one of the fastest ways to cause adhesion failure.
Step-by-step preparation for lasting results
With everything ready, it’s time to prepare surfaces correctly. This is where most homeowners either get it right or set themselves up for failure. The steps below are not optional shortcuts; they are the reason professional paint jobs outlast DIY ones by years.
1. Clean every surface thoroughly.
Use a pressure washer or a hose with a scrub brush and appropriate cleaning solution to remove dirt, mildew, chalking, and other contaminants. Pay close attention to areas beneath overhangs and near grade level where mildew tends to accumulate. Allow the surface to dry completely, at minimum 24 to 48 hours in warm weather, before moving forward.
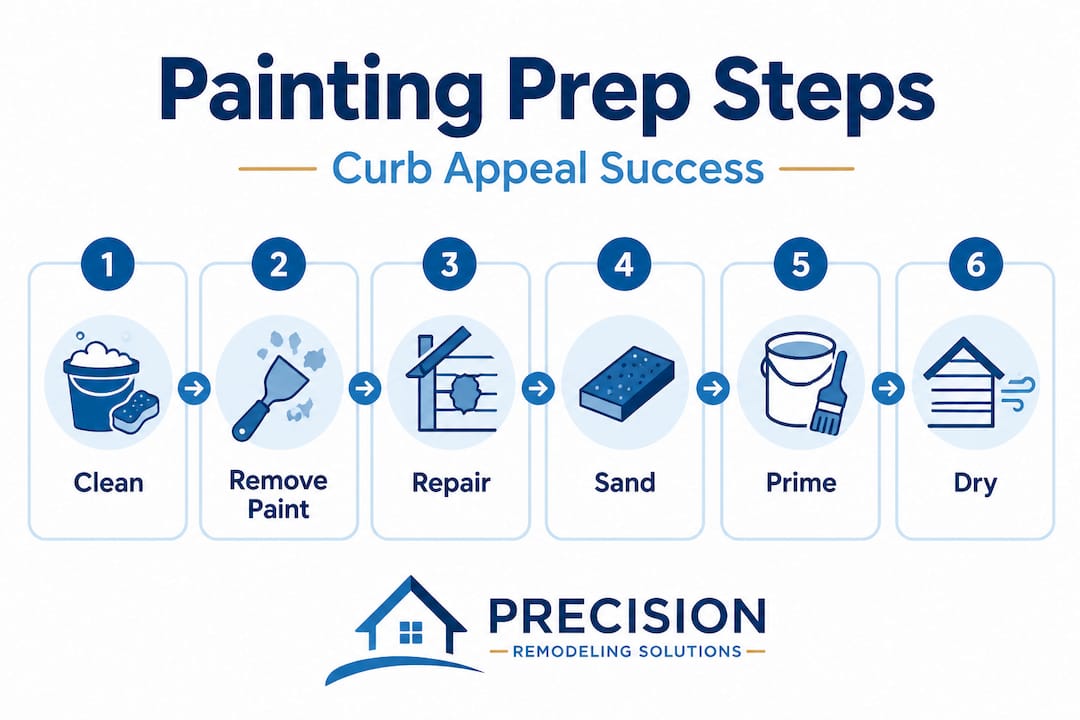
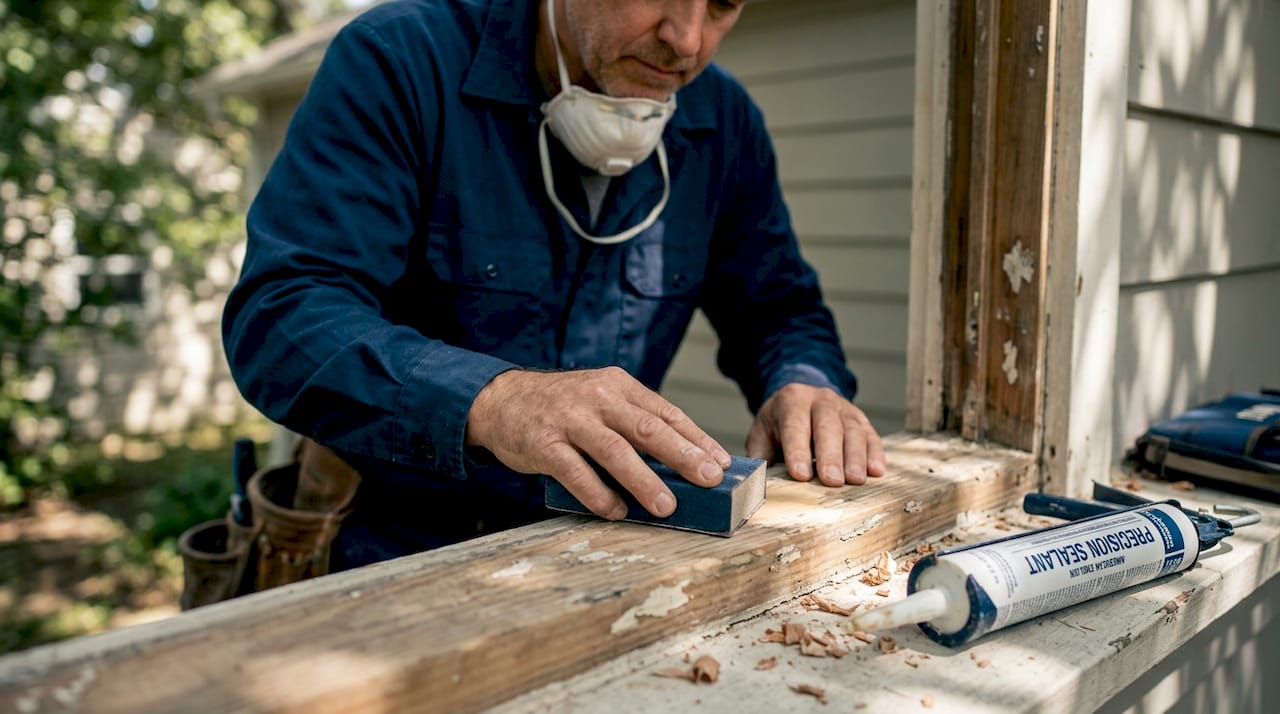
2. Remove all loose or peeling paint.
Use a putty knife, wire brush, or paint scraper to remove any paint that is cracking, peeling, or flaking. Don’t just scrape the obvious areas. Run your hand over the surface and listen for hollow sounds that might indicate bubbling under the surface. Any loose paint left behind will cause your new coating to fail in the same spot.
3. Repair cracks, holes, and damaged areas.
Fill cracks with paintable exterior caulk. Use an exterior patching compound or wood filler for larger holes or gouges. Feather the edges so repaired spots blend with the surrounding surface. Let all repairs cure fully per the manufacturer’s instructions before sanding.
4. Sand repaired areas and rough transitions.
Once repairs are cured, sand them smooth starting with 120-grit and finishing with 220-grit sandpaper. Sand any sharp paint edges where old paint meets bare surface. This “feathering” step prevents visible ridges from telegraphing through your new paint.
5. Prime all bare and repaired spots.
Spot prime every area where bare substrate is exposed or where you’ve made repairs. As industry guidance consistently confirms, surfaces must be clean, dry, dull, and sound, and moisture content must meet product limits before any primer or paint goes on.
6. Allow proper dry and cure times.
Check your primer label for the minimum and maximum recoat windows. Don’t rush this step based on how dry the surface looks or feels. Humidity and temperature both affect dry times, and painting too soon over primer can trap moisture and cause blistering.
Here’s a general reference for common conditions and expected dry times:
| Condition | Primer dry time | Paint dry to touch | Full recoat window |
|---|---|---|---|
| 70°F, 50% humidity | 1 to 2 hours | 1 to 2 hours | 4 hours minimum |
| 85°F, 70% humidity | 2 to 4 hours | 2 to 3 hours | 6 to 8 hours |
| 55°F, 60% humidity | 4 to 6 hours | 3 to 4 hours | 12 to 24 hours |
| High shade, 65°F | 3 to 5 hours | 2 to 4 hours | 8 to 16 hours |
Pro Tip: Never use weather or “feel” as your only guide for recoat timing. Paint and primer labels carry the manufacturer’s tested recoat windows for a reason. In humid climates like those found across Bucks County and New Castle, Delaware, shaded north-facing walls can stay damp long after sun-exposed sides feel perfectly dry.
Looking for ideas beyond painting to lift your home’s curb appeal? Browse exterior remodeling ideas to see what’s possible when painting is just the beginning.
Handling tricky surfaces and edge cases
Some surfaces require extra attention and specialized prep. Don’t let this section intimidate you. Understanding how to handle these situations means fewer surprises and a much better result.
Surfaces that need special treatment:
- High-gloss painted trim and doors: Glossy surfaces don’t accept new paint well without mechanical abrasion. Sand with 220-grit or 320-grit paper until the sheen is gone and the surface looks dull. Then clean and prime.
- Aluminum gutters and downspouts: These need a rust-inhibiting or self-etching primer to ensure adhesion. Clean off oxidation with a cloth dampened with mineral spirits before priming.
- Previously painted metal trim: Wire brush any rust, apply a rust-inhibiting primer, and allow full cure before topcoating.
- Fiber cement lap siding: Always follow the manufacturer’s paint system. Some fiber cement products void warranties if you use an unapproved primer or skip priming entirely.
- Stucco and masonry: Use a block filler or masonry primer to fill the porous surface before painting. Skipping this step means your topcoat soaks in unevenly and you’ll need twice as much paint to get coverage.
For glossy or supersmooth substrates, roughening the surface improves adhesion before you apply any primer or paint. This isn’t just a guideline; it’s the difference between paint that sticks and paint that peels within a year.
“Always follow the paint or primer label for recoat windows and approved surface conditions. Don’t rely on rules of thumb alone, especially in humid or shade-heavy areas where parts of the same wall can dry at different rates.” (Fine Homebuilding)
That advice applies here too. Label guidance for recoat conditions takes priority over any general rule you’ve heard, including from experienced painters who learned in a different climate.
One more important point on priming: some modern paints are marketed as “self-priming,” which sounds appealing. However, as a builder’s exterior painting guidance makes clear, priming bare wood and repaired spots separately ensures a uniform bond that self-priming paints rarely deliver on their own.
Pro Tip: On any repaired spot or area of bare wood, apply a dedicated quality primer even if your topcoat claims to be self-priming. The uniform adhesion you get from that extra step is always worth the time and material cost.
If you’d like a professional assessment of your home’s exterior before committing to a full project, you can request a quote and we’ll walk through the best approach with you.
Applying paint and verifying your work
Surface prep is done. Now, paint application and verification ensure your project lasts as long as it should. Even great prep can be undone by sloppy application, so take the same care here that you gave to the steps above.
Application steps for even coverage:
- Start at the top and work down. Paint from the highest point (eaves and fascia) toward the lower sections. This prevents drips from landing on freshly painted surfaces below.
- Cut in before rolling. Use a brush to paint edges, corners, trim lines, and areas a roller can’t reach. Let cut-in areas overlap slightly when rolling for a seamless finish.
- Apply paint in the direction of the grain or siding profile. For lap siding, paint along the length of each board. For vertical siding, paint up and down. This prevents lap marks.
- Maintain a wet edge. Work in manageable sections so you’re always blending into wet paint. Letting paint dry before overlapping causes visible streaks and sheen differences.
- Apply two coats consistently. One coat is rarely enough for full protection. Allow the first coat to dry according to label instructions before applying the second.
Key checkpoints to verify quality:
- Check that coverage is uniform with no thin or transparent patches where the substrate shows through.
- Look for runs or sags and correct them while paint is still wet by brushing them out.
- Verify that all trim, caulk lines, and transition areas are fully coated with no gaps.
- Inspect each section in both direct sunlight and shade to catch sheen differences or missed spots.
- Confirm that recoat times were respected by referring back to your label notes.
As Sherwin-Williams emphasizes, washing, drying, repairing cracks and holes, and applying primer are all linked to whether your final topcoat performs. Skipping any one of those steps compromises the ones that follow. The verification stage is your last chance to catch anything that needs correction before it cures permanently.
Pro Tip: After each coat dries, inspect every section of the house by running your hand lightly over the surface. Rough patches, bubbles, or tacky areas are signs that something needs attention before you apply the next coat.
For a broader look at what exterior updates can accomplish for your home, explore our exterior remodeling services to see how painting fits into a larger renovation picture.
What most guides miss about exterior painting success
Here’s something you won’t read in most painting tutorials: the biggest variable isn’t the paint, the primer, or even the prep technique. It’s the specific conditions of your property on the specific days you’re painting.
In Bucks County and the New Castle, Delaware area, you’re dealing with humid summers, shaded properties surrounded by mature trees, and spring seasons where temperature swings of 20 degrees between morning and afternoon are common. These conditions make the label the single most important tool in your kit. Generic rules like “wait four hours between coats” or “don’t paint below 50 degrees” are starting points, not guarantees.
The north side of a home in a wooded lot in Newtown, Pennsylvania can still be holding moisture from morning dew at 2 p.m. on an otherwise dry day. If you applied paint there at noon because the south side felt dry, you’ve made a very costly mistake. Label instructions for recoat windows are calibrated by manufacturers who test for these kinds of variations. They’re your best protection against the kind of failure that rules of thumb can’t prevent.
We’ve seen homeowners spend thousands on materials and several weekends on labor, only to watch paint lift off north-facing siding the following spring. Not because they chose cheap paint. Because they trusted a guideline that didn’t account for their home’s actual conditions. Exterior remodeling ideas can inspire your next project, but no aesthetic choice matters if the coating beneath it fails.
Trust the label. Adapt to your site. That’s the mindset that separates a paint job that lasts five years from one that lasts fifteen.
Ready for a curb appeal upgrade? Explore expert remodeling solutions
Exterior painting is a meaningful investment in your home’s appearance and value. But for many homeowners in Bucks County and New Castle, Delaware, it’s just one piece of a larger vision.

At Precision Remodeling Solutions, we help homeowners take that vision further. Whether you’re combining a fresh paint job with new siding, upgraded windows, or a complete exterior transformation, our team brings the same attention to prep and quality that this guide describes. Explore our exterior remodeling services to see the full range of what we offer, or get inspired by real project results in our curb appeal remodeling ideas gallery. Contact us today for a free estimate and let’s build something you’ll be proud of.
Frequently asked questions
Do I need to use primer on all surfaces before exterior painting?
Primer is essential for bare wood and repaired spots, and pro guidance consistently recommends it even when modern paints claim to be self-priming, because it ensures a uniform bond that topcoat-only application rarely achieves.
How long should I wait between coats of exterior paint?
Always follow the specific recoat window listed on your paint label, because label instructions for recoat times account for humidity and moisture variables that generic rules simply cannot predict accurately.
What causes exterior paint to peel or fail prematurely?
Inadequate surface prep is the leading cause, including skipping cleaning, failing to remove loose paint, and not priming bare or repaired areas before applying a topcoat.
How do I prep high-gloss or smooth surfaces for painting?
Sand supersmooth or glossy surfaces with 220-grit or 320-grit sandpaper until the sheen is completely gone, then clean the surface thoroughly before applying primer, because roughening glossy substrates is what allows paint to bond correctly.
Recommended
- Exterior Remodeling Ideas That Boost Curb Appeal & Function – Precision Remodeling Solutions
- Your exterior improvement checklist for curb appeal success – Precision Remodeling Solutions
- Request a Quote – Precision Remodeling Solutions
- Home Additions That Boost Property Value in Lower Bucks County – Precision Remodeling Solutions