TL;DR:
- Your roof acts as the first barrier against weather, making proper replacement essential for home protection.
- Obtaining local permits, selecting licensed contractors, and verifying deck conditions are critical steps to avoid costly mistakes.
Your roof is the first line of defense between your family and everything the weather throws at it. When it reaches the end of its life, or a bad storm forces the issue, the pressure to move fast can lead to costly mistakes. Skipping permits, hiring the wrong contractor, or missing a deck problem buried under old shingles can turn a straightforward replacement into a drawn-out, expensive headache. This guide walks you through the entire process, from groundwork to final inspection, so homeowners in Lower and Central Bucks County and New Castle, Delaware can move forward with a clear plan and real confidence.
Table of Contents
- What you need before starting your roof replacement
- Step-by-step roof replacement process
- Storm damage: speed vs. quality pitfalls to avoid
- Final walkthrough and long-term quality checks
- The truth most homeowners miss about local roof replacements
- Ready for a roof replacement or more complex remodeling?
- Frequently asked questions
Key Takeaways
| Point | Details |
|---|---|
| Permit requirements differ | Verify local permit needs before your project to avoid delays or code issues. |
| Decking must be checked | Always confirm the underlying decking is sound before installing new roofing. |
| Quality control prevents issues | Insist on proper flashing, nailing, and documentation, especially after storm damage. |
| Final walkthrough is essential | A thorough post-install inspection ensures safety and long-term performance. |
What you need before starting your roof replacement
With the stakes established, the first step is getting ready on the right legal and logistical footing. This phase tends to be underestimated, and that’s exactly where problems start.
Permits: not optional, not one-size-fits-all
One of the biggest surprises for homeowners is discovering that permit rules are not uniform across the region. Permit requirements differ by locality, meaning townships and boroughs in Bucks County each set their own thresholds and paperwork. A project that requires a permit in one municipality may not trigger the same requirement two miles away. That variability makes it your responsibility to contact your specific township or borough office before a single shingle comes off.
In New Castle, Delaware, the rules are more clearly defined at the city level. Permits are required for roof covering replacement if more than 25% of the sheathing is being replaced. If your project stays under that threshold, you may not need a permit, but the moment you exceed it, pulling the correct permit is mandatory.
Working without the required permit doesn’t just risk a fine. It can create problems when you sell the home, void your homeowner’s insurance coverage for storm claims, and even require tear-off and redo work after the fact.
Pro Tip: Before signing any contract, ask your contractor in writing to confirm which permits are required for your specific project address. A trustworthy contractor will know immediately and will pull the permit themselves, not ask you to handle it.
Choosing a contractor and reviewing your estimate
Not all roofing estimates look the same, and the differences matter. A solid estimate should break down labor, materials, decking repair allowances, disposal fees, and permit costs as separate line items. When things are bundled together, it becomes much harder to spot what was left out. Take the time to review choosing a roofing contractor criteria, particularly licensing, insurance certificates, and local references.
Every contractor bidding on your job should carry general liability insurance and workers’ compensation. Ask for certificates, not promises. Hiring a contractor without these is similar to letting an unlicensed driver take your car. The liability falls back on you.
Also review what your roof estimate essentials should include:
- Material specifications: Shingle brand, weight class, and color
- Underlayment type: Synthetic vs. felt, and coverage area
- Flashing details: Whether old flashing is being replaced or reused
- Ventilation: Ridge vent, soffit vents, or attic fan replacements noted
- Warranty terms: Both manufacturer and contractor labor warranties
- Contingency allowance: A dollar amount set aside for unexpected deck repair
| Item | What to look for | Red flag |
|---|---|---|
| Permit costs | Listed as a separate line item | Bundled with “misc” or absent |
| Decking repair | Allowance or per-sheet pricing | Not mentioned at all |
| Flashing | Replacement specified | “Reuse existing” with no inspection |
| Warranty | Both material and labor | Labor warranty missing |
| Insurance proof | Certificate attached to estimate | Verbal assurance only |
Step-by-step roof replacement process
Once you’re prepared, here’s exactly what to expect as the work unfolds. Knowing each stage reduces anxiety and helps you ask the right questions at the right time.
The full sequence from teardown to final inspection
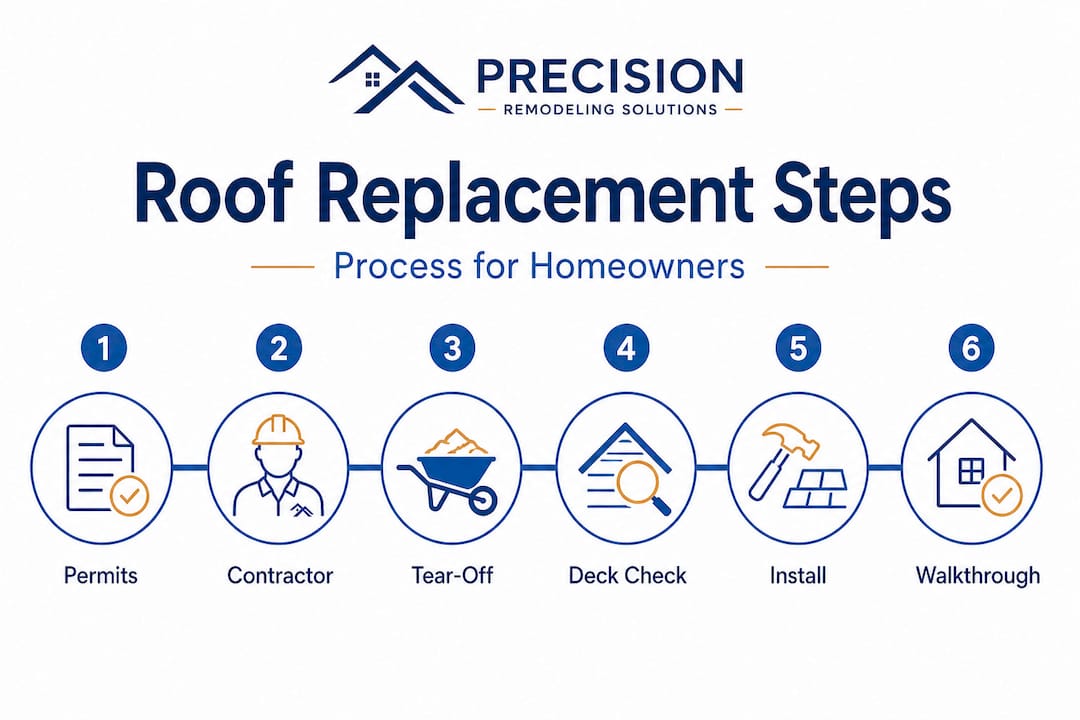
- Site preparation: The crew protects your landscaping, driveway, and siding with tarps and plywood. This matters because falling nails and debris cause real damage to plants and gutters.
- Tear-off: Old shingles, underlayment, and any failing flashing are removed. Most quality jobs call for a full tear-off rather than an overlay, giving the crew clear access to the deck.
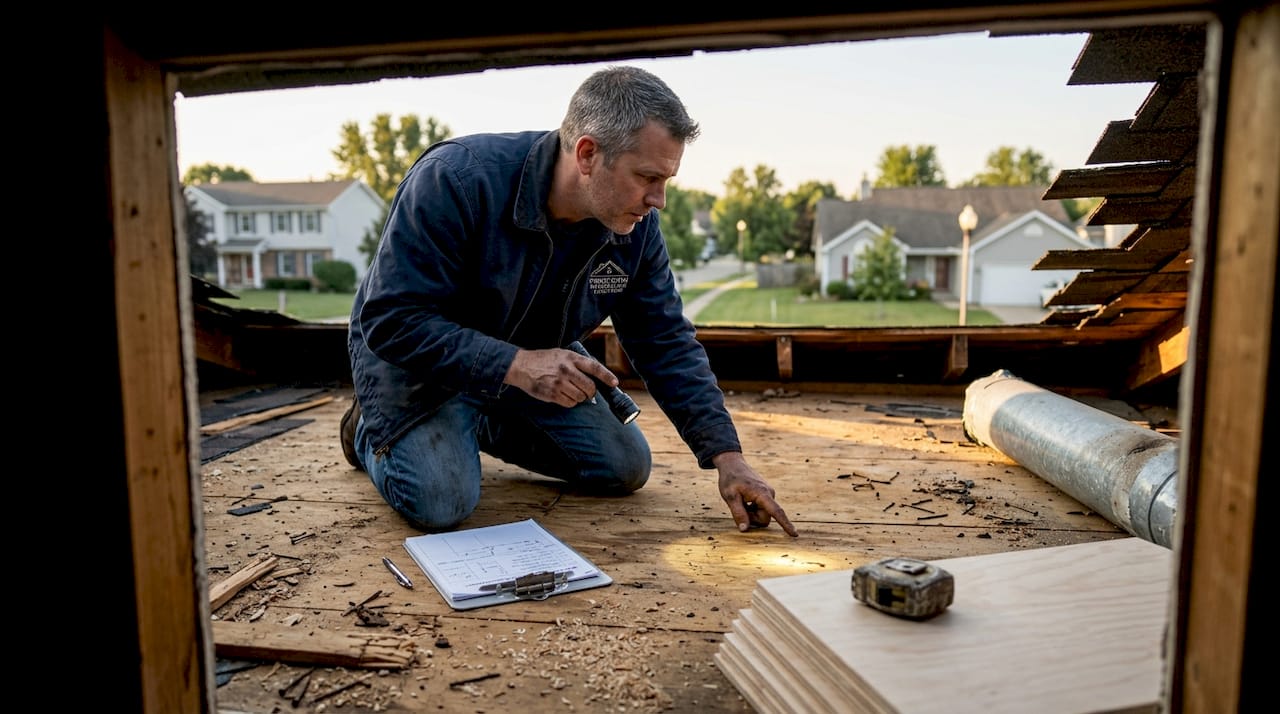
- Deck inspection: Verifying underlying deck condition is critical at this stage. Soft spots, rot, and delaminated plywood must be replaced before any new material goes down. This is non-negotiable.
- Underlayment installation: Synthetic underlayment or ice-and-water shield (especially along eaves and in valleys) goes down first, acting as a secondary water barrier.
- Flashing installation: Step flashing around chimneys, walls, and skylights is installed or replaced. This is one of the most leak-prone areas if done poorly.
- Shingle installation: Shingles are laid from the eave up, overlapping according to manufacturer specs. Nailing pattern and nail depth are closely monitored by quality crews.
- Ridge cap and ventilation: Ridge caps seal the peak, and ventilation components are checked or upgraded for proper attic airflow.
- Cleanup: Magnetic rollers pull nails from the yard and driveway. All debris is hauled away.
- Final inspection: A walkthrough with the homeowner confirms visible quality. In permit-required projects, a municipal inspector may also visit.
“Your roof replacement timeline can be influenced by deck damage, weather delays, and material lead times, so understanding each phase helps you plan around daily life.” Learn more about what affects your roof replacement timeline.
Tear-off vs. overlay: which approach is right?
| Approach | How it works | Best for | Watch out for |
|---|---|---|---|
| Full tear-off | All old layers removed before new install | Most replacements, especially with 2+ shingle layers | Slightly higher cost but far better results |
| Overlay (layover) | New shingles installed over existing | Budget situations, single layer only, short-term fix | Hides deck problems, adds weight, voids some warranties |
In most cases, a full tear-off is the right call. It gives you and your contractor full visibility into the deck, and it keeps your manufacturer warranty intact.
Pro Tip: Move fragile items in your attic before work begins. Vibrations from tear-off can knock down stored items and disturb insulation. Also, consider staying home during replacement or making alternate arrangements for pets and young children during the noisiest phase.
After the project wraps up, staying on top of seasonal roof maintenance is what keeps your new roof performing for decades instead of years.
Storm damage: speed vs. quality pitfalls to avoid
While most roof replacements follow a standard workflow, storm damage introduces specific risks that homeowners must watch for. When hail or wind hits a neighborhood, a surge of roofing activity follows quickly, and rushed work creates defects that show up months later.
Why urgency creates risk
After a major storm, demand for roofers spikes fast. Contractors stretch their crews, work longer hours, and sometimes skip steps to keep up. The speed after storms environment leads directly to shortcuts in flashing, nailing patterns, and valley treatment, all of which become common post-install defects that can go unnoticed until water gets inside.
The four most common shortcuts in rushed post-storm work include:
- Missed or improperly sealed flashing: Water enters at the edges of chimneys, skylights, and walls where flashing gaps are left unsealed
- Improper nailing: Nails driven too high, too low, or at wrong angles fail to hold shingles during the next windstorm
- Cut valleys: Open metal valleys require precise cuts and sealing. A rushed crew may lap shingles sloppily, creating a slow leak path
- Missing documentation: Without photos of the completed installation, you have no record of what was done if a problem surfaces later
“Homeowners who experience storm damage deserve both speed and quality, not a trade-off between the two.” Understanding avoiding roofing delays can help you set realistic expectations while holding your contractor to a high standard.
How to protect yourself during storm season repairs
Before work starts, ask for a documented scope of work that lists every component being replaced. Request photos during the installation, specifically of the deck before and after underlayment is installed, and of all flashing placements. Walk the perimeter with your contractor when the job is done and ask about anything that looks unfamiliar.
Stat callout: Storm-related roofing claims are among the most disputed insurance claims in the mid-Atlantic region, largely because of post-install defects that go undocumented at time of installation.
Use the storm as an opportunity, not just a crisis. Your storm-damaged roof guide can help you identify hidden damage and make informed decisions about upgrades, like impact-resistant shingles, that can actually reduce future insurance premiums.
Final walkthrough and long-term quality checks
After installation, don’t let your guard down. Final checks and regular follow-up are what keep your investment protected and catch anything that might have been missed before it becomes a costly repair.
What to check at the end of your project
Final walkthroughs protect against missed steps or local code breaches, and they should be documented by your contractor with photos and sign-off forms. Here’s what to cover:
- Exterior finish quality: Walk the perimeter and look at shingle alignment, ridge cap installation, and visible flashing. Uneven lines or gaps at transitions are red flags.
- Gutters and drip edge: Confirm that drip edge is installed along eaves and rakes, directing water away from your fascia boards.
- Attic inspection: Go into the attic and look for any daylight coming through, which indicates gaps. Check for proper ventilation airflow.
- Attic insulation: Confirm that insulation wasn’t disturbed or compressed during installation, which would reduce its effectiveness.
- Cleanup confirmation: Nail sweep, full debris removal, and a final dumpster haul are part of a complete job.
After the walkthrough, request all documentation in writing:
- Manufacturer’s warranty registration form (you typically must activate this yourself within a set window)
- Contractor labor warranty in writing
- Permit closure or inspection sign-off from your municipality
- Photo log of the installation process
Pro Tip: Create a dedicated folder, physical or digital, where you store all roofing documents, warranty cards, and inspection photos. Label it clearly and review your roof maintenance tips calendar to schedule a professional inspection every two to three years.
If you’re unsure whether a repair or full replacement was the right call for your situation, review the factors that guide the repair or replace decision so you’re better informed for any future issues.
The truth most homeowners miss about local roof replacements
Even with a process map in hand, the difference between a durable new roof and disappointing results often comes down to one thing: whether you verified that all the moving parts were aligned before work started.
Most guides focus on price comparison and material selection. Those things matter, but they miss the bigger picture. We’ve seen homeowners hire the lowest bidder only to discover months later that no permit was ever pulled, no municipal inspection was completed, and a code violation was sitting in their attic. That situation surfaces at the worst possible time: during a sale, during a claim, or after a leak.
You must verify that contractor and code requirements are all coordinated before work begins, because no one else is going to do that full level of diligence for you. Your insurance company won’t. The contractor won’t always volunteer it. And a permit that wasn’t pulled can invalidate a warranty or create a title issue later.
Real value in a roof replacement comes from three things: transparency in the written contract, legitimate paperwork that includes pulled permits and closed inspections, and a hands-on final walkthrough where the contractor walks you through what was done and why. If a contractor resists any of those three, that’s your answer.
We also caution homeowners to watch for aggressive door-knockers after a storm. Learn the common patterns in roofing scams to avoid before you sign anything, especially if someone approaches you first rather than the other way around.
Ready for a roof replacement or more complex remodeling?
With these steps and best practices in place, you’re in position to turn your roof and home remodel into a long-term success. Whether you’re managing a straightforward shingle replacement or thinking about a larger renovation, having the right team behind you makes every stage run smoother.
At Precision Remodeling Solutions, we handle roof replacements and full home renovations for homeowners across Lower and Central Bucks County and New Castle, Delaware. From permit coordination to final walkthrough, our crews follow local code requirements and give you full documentation at every stage. We also offer a complete range of services beyond roofing, including kitchens, bathrooms, finished basement services, additions, and exterior upgrades. Explore our property renovation guide to see how a full-home update can work alongside your roofing project, and reach out today for a free, no-pressure estimate.
Frequently asked questions
How long does a typical roof replacement take?
Most residential roof replacements are completed in 1 to 3 days, depending on weather conditions and the size of the project.
Do I need a permit for a roof replacement in Bucks County, PA?
Yes, you typically need a permit from your specific township or borough, since permit requirements are set by localities under the Uniform Construction Code in Bucks County.
When is a permit needed for roof replacement in New Castle, Delaware?
A permit is required when your project replaces more than 25% of the sheathing or roof covering, as New Castle requires a permit at that threshold.
What’s the most common mistake during roof replacement?
The most common mistake is failing to identify and repair underlying deck damage before new materials go down, since deck and substrate condition directly affects how long the new roof will last.
How can I ensure my contractor doesn’t rush or cut corners after storm damage?
Ask for photo documentation of flashing, nailing patterns, and underlayment during installation, and request a final walkthrough, since documentation and walkthroughs are the best protection against storm-related shortcuts.
Recommended
- How to choose a roofing contractor: 5 proven steps – Precision Remodeling Solutions
- Typical Roof Replacement Timeline: What to Expect – Precision Remodeling Solutions
- Moving Out During Roof Replacement: Is It Necessary? – Precision Remodeling Solutions
- Repair Vs. Replace: Which Roofing Option Should You Choose? – Precision Remodeling Solutions